Overview
Enjoying our The Forge Wiki? Check out another one we made for FireAtacck’s upcoming game Abyss!

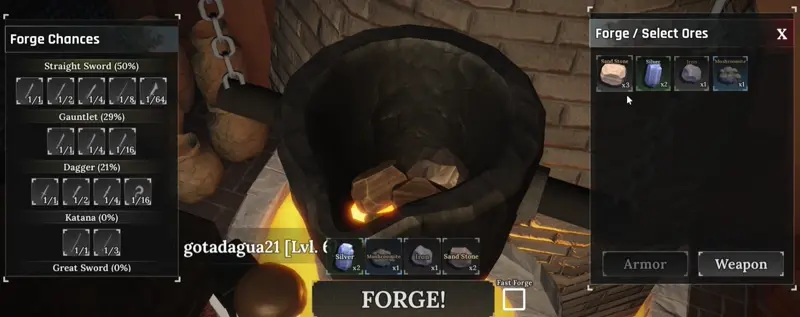
Players can start the process of forging Weapons and Armor by visiting the Forge and interacting with the crucible. Doing so will open up the forging menu, in which players can select which Ores they can smelt down and use for crafting.
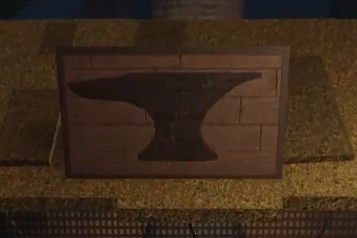
The Forge is located in the center of the Stonewake’s Cross village, between the Potion Seller and Runemaker.
Quick Tip: The forge icon is always present on the players compass, follow it to easily get to the forge!
The Quality and Stats of a crafted product are influenced by the Quality and Stat Multiplier of Ores added to the crucible, higher Rarity Ores will provide better Multipliers to crafted Weapons and Armor.
Mini-Game Explained
The Forging mini-game consists of three different steps:
- The First Step:
- Heating the Crucible.
- The Second Step:
- Pouring the melted Ores into a mold.
- The Third Step:
- Using the Anvil to hammer the product into shape.
The First Step

The First Step of the forging process in The Forge has players choosing which, and how many Ores they’ll add to the crucible to be smelted down. At the bottom of the Forge/Select Ores menu, players can choose if they wish to craft a Weapon or an Armor.
The amount of Ores added directly corelates to which type of Weapon or Armor can be crafted from them. A higher number of Ores will yield greater chances of crafting larger Weapons and heavier Armor.
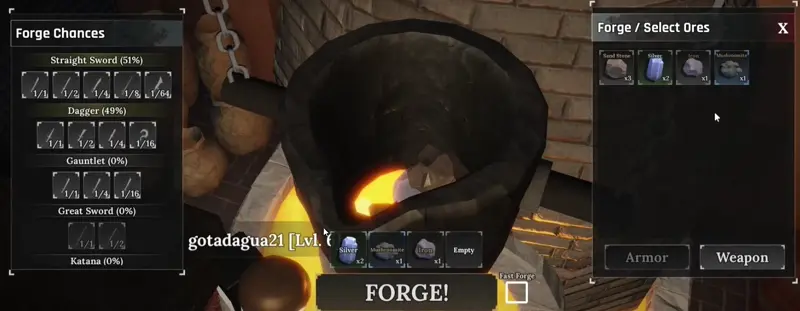
After adding Ores to the crucible, players will then need to smelt them by completing the first mini-game.
The first mini-game can be completed by rapidly moving the forge’s bellows, located on the left-hand side of of the screen and indicated by a green arrow. This will cause the forge to produce more heat, smelting the ores in the process.
The Second Step

The Second Step of the forging process will require a bit of balance on the player’s part. You will need to pour out the smelted Ores into a mold, which will later be broken apart to start the third and final step.
To complete the Second Step, players will need to keep their eyes on the black bar located on the right side of their screen. To perfectly pour the smelted Ores into a mold, and to quickly fill the progress bar at the bottom, you will need to balance the White Mark inside the Yellow Bar at all times. This can be done by holding down and releasing the [Left Mouse Button]. Holding it down will cause the White Mark to rise towards the top, and releasing it will cause it to plummet downward.

The Third Step

The Third, and final step, of the forging process has players breaking apart mold filled with smelted down ores, to uncover a rough shape of the Weapon or Armor they mean to craft. To complete the crafting process, you will need to further refine it by hammering it at the anvil.
Breaking the mold will start the mini-game. To complete it, players will need to click on the circles appearing around the Weapon or Armor they’re crafting. Timing is also of the essence here, as clicking on the circle just as it reaches the inner edge will prompt it to be Perfect. This greatly affects the quality of the crafted Weapon or Armor. Afterwards, the product will be quenched in a bucket of water.
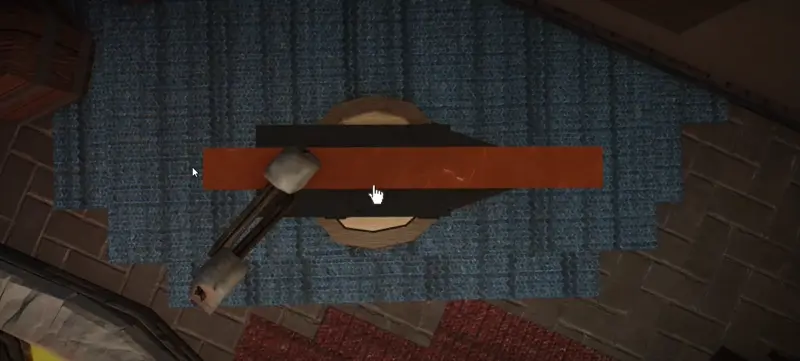
This final step completes the crafting process in The Forge. Players can choose to sell their crafted products, or equip and use them from their inventory.

Comments
Sign in to post a comment.
@SillyJackal
7 days ago
why do i get 90% even if i hit all the circles with perfect?